How to cut and stitch Katori Blouse (Different Front & Back Colour).
For 34/36 inch chest take two colours of cloth of 60cm. (front piece and sleeve) and 40cm.(back piece and paipin).
For stitching blouse first do the marking and the cutting on a paper. And use this paper for keeping on the cloth and cutting it.
A = Length (Shoulder to Waist) + 2 in
B = Breadth (Chest Circumference + 6 in) divided by 4
C = (Shoulder +2 in) divide by 2
D = Front Neck 5 in or as required, back neck 6 in or as required
E = 3 to 3.5 in
F = E-1.25 in (Max 1.5 in)
G = Sleeve Length + 2 in
H = Sleeve Circumference + 2 in
Step 1:- First do the marking and cutting on a paper. Take two paper pieces according to the blouse.
Step 2:- Now fold your cloth and keep it on the cloth and do the marking and cutting of it (you have to take 60cm piece and cut front piece). For back piece and half sleeves you have to use 40cm piece.
Step 3:- First take your back side piece seeing the figure do the cut and join three piece
Step 4:- Take your paper cut sleeve and see the figure and cut into two colour. Now you have to join three pieces, fold courner side 1inch and keep it separate.
Step 5:- Now take your piece no.1 and do it cross stitch(2and 1/2 inch to 0).Then see the figure and attach with piece no.2, now bottom side attach piece no.3, next you have to attach button belt right side and button hole belt left. First keep this belt out side and stitch then turn belt inside and again stitch. Now you have to join both the shoulder and both the sides.
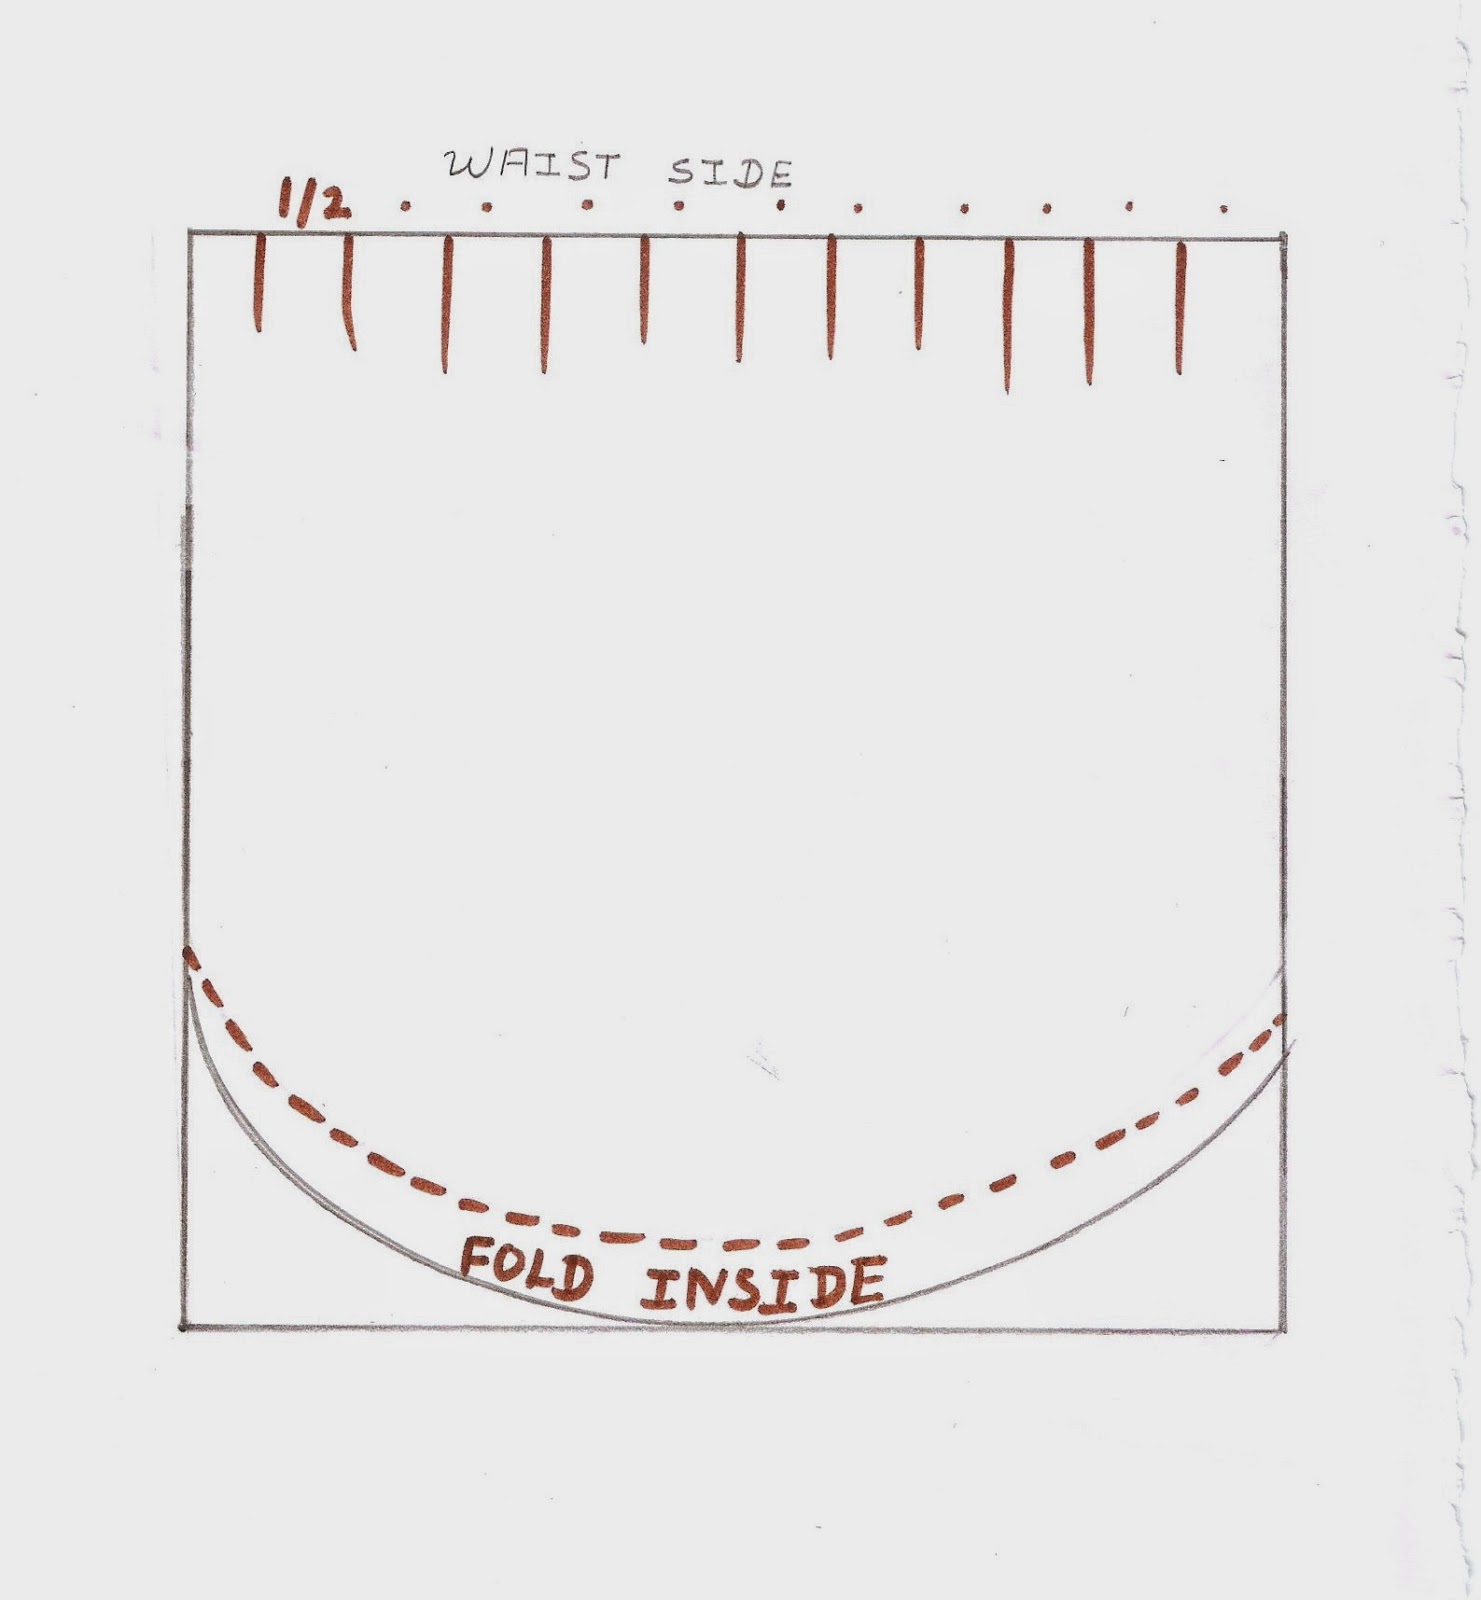
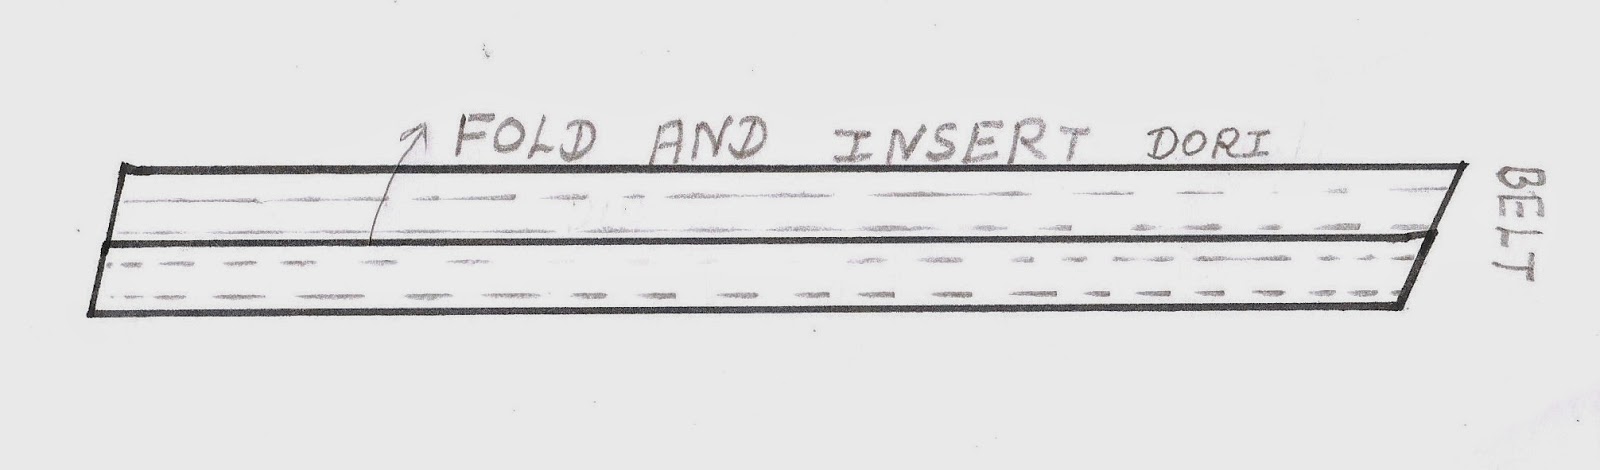
Step 6:- Now you have to make a belt which one length should be according to your waist+1inch and breadth should be 2inch, this one belt you have to attach with your blouse waist side, first stitch out side and fold cloth inside and again stitch.
Step 7:- Now you have to mark inside your blouse according to your waist and chest measure, and stitch it extra inch.
Step 8:- Next you have to join your sleeve.
Your blouse is ready!


.png)
.png)

.png)

%2B-%2BBack%2BPiece%2B(Full%2BView).png)
For 34/36 inch chest take two colours of cloth of 60cm. (front piece and sleeve) and 40cm.(back piece and paipin).
For stitching blouse first do the marking and the cutting on a paper. And use this paper for keeping on the cloth and cutting it.
A = Length (Shoulder to Waist) + 2 in
B = Breadth (Chest Circumference + 6 in) divided by 4
C = (Shoulder +2 in) divide by 2
D = Front Neck 5 in or as required, back neck 6 in or as required
E = 3 to 3.5 in
F = E-1.25 in (Max 1.5 in)
G = Sleeve Length + 2 in
H = Sleeve Circumference + 2 in
Step 1:- First do the marking and cutting on a paper. Take two paper pieces according to the blouse.
Step 2:- Now fold your cloth and keep it on the cloth and do the marking and cutting of it (you have to take 60cm piece and cut front piece). For back piece and half sleeves you have to use 40cm piece.
Step 3:- First take your back side piece seeing the figure do the cut and join three piece
Step 4:- Take your paper cut sleeve and see the figure and cut into two colour. Now you have to join three pieces, fold courner side 1inch and keep it separate.
Step 5:- Now take your piece no.1 and do it cross stitch(2and 1/2 inch to 0).Then see the figure and attach with piece no.2, now bottom side attach piece no.3, next you have to attach button belt right side and button hole belt left. First keep this belt out side and stitch then turn belt inside and again stitch. Now you have to join both the shoulder and both the sides.
Step 6:- Now you have to make a belt which one length should be according to your waist+1inch and breadth should be 2inch, this one belt you have to attach with your blouse waist side, first stitch out side and fold cloth inside and again stitch.
Step 7:- Now you have to mark inside your blouse according to your waist and chest measure, and stitch it extra inch.
Step 8:- Next you have to join your sleeve.
Your blouse is ready!
Keep your paper pieces on the cloth piece and do the marking and cutting of the cloth piece.
Author: Mrs. Bhawna Gupta is a professional tailor for ladies dresses (Indian Blouse, Chudidar, Salwar Suit, Maxi, Frock, Kids Skirts, Tops etc) over more than a decade. She had completed the Advanced Diploma in Tailoring from Madras Institute of Tailoring. Disclaimer - This BLOG is published for learning purpose. Author has no liability for any damage or loss. This blog cannot used for commercial, publishing in other electronic media purposes.


.png)
.png)

.png)
.png)
.png)


.png)

.png)
