Step by Step Cutting and Stitching of Nightie.
STEP1:- Take the measure according to the following steps;-
A: Length+2 inch,
B: Breadth(chest circumference)+4divided by 4,
C: Shoulder to shoulder+1inch,
D: Front neck 3inch(or your wish), back neck 2inch(or your wish),
E: Sleeve length 7inch( or your wish), arm circumference(chest circumference divided by 4 -1),
F: Hip + 6inch,
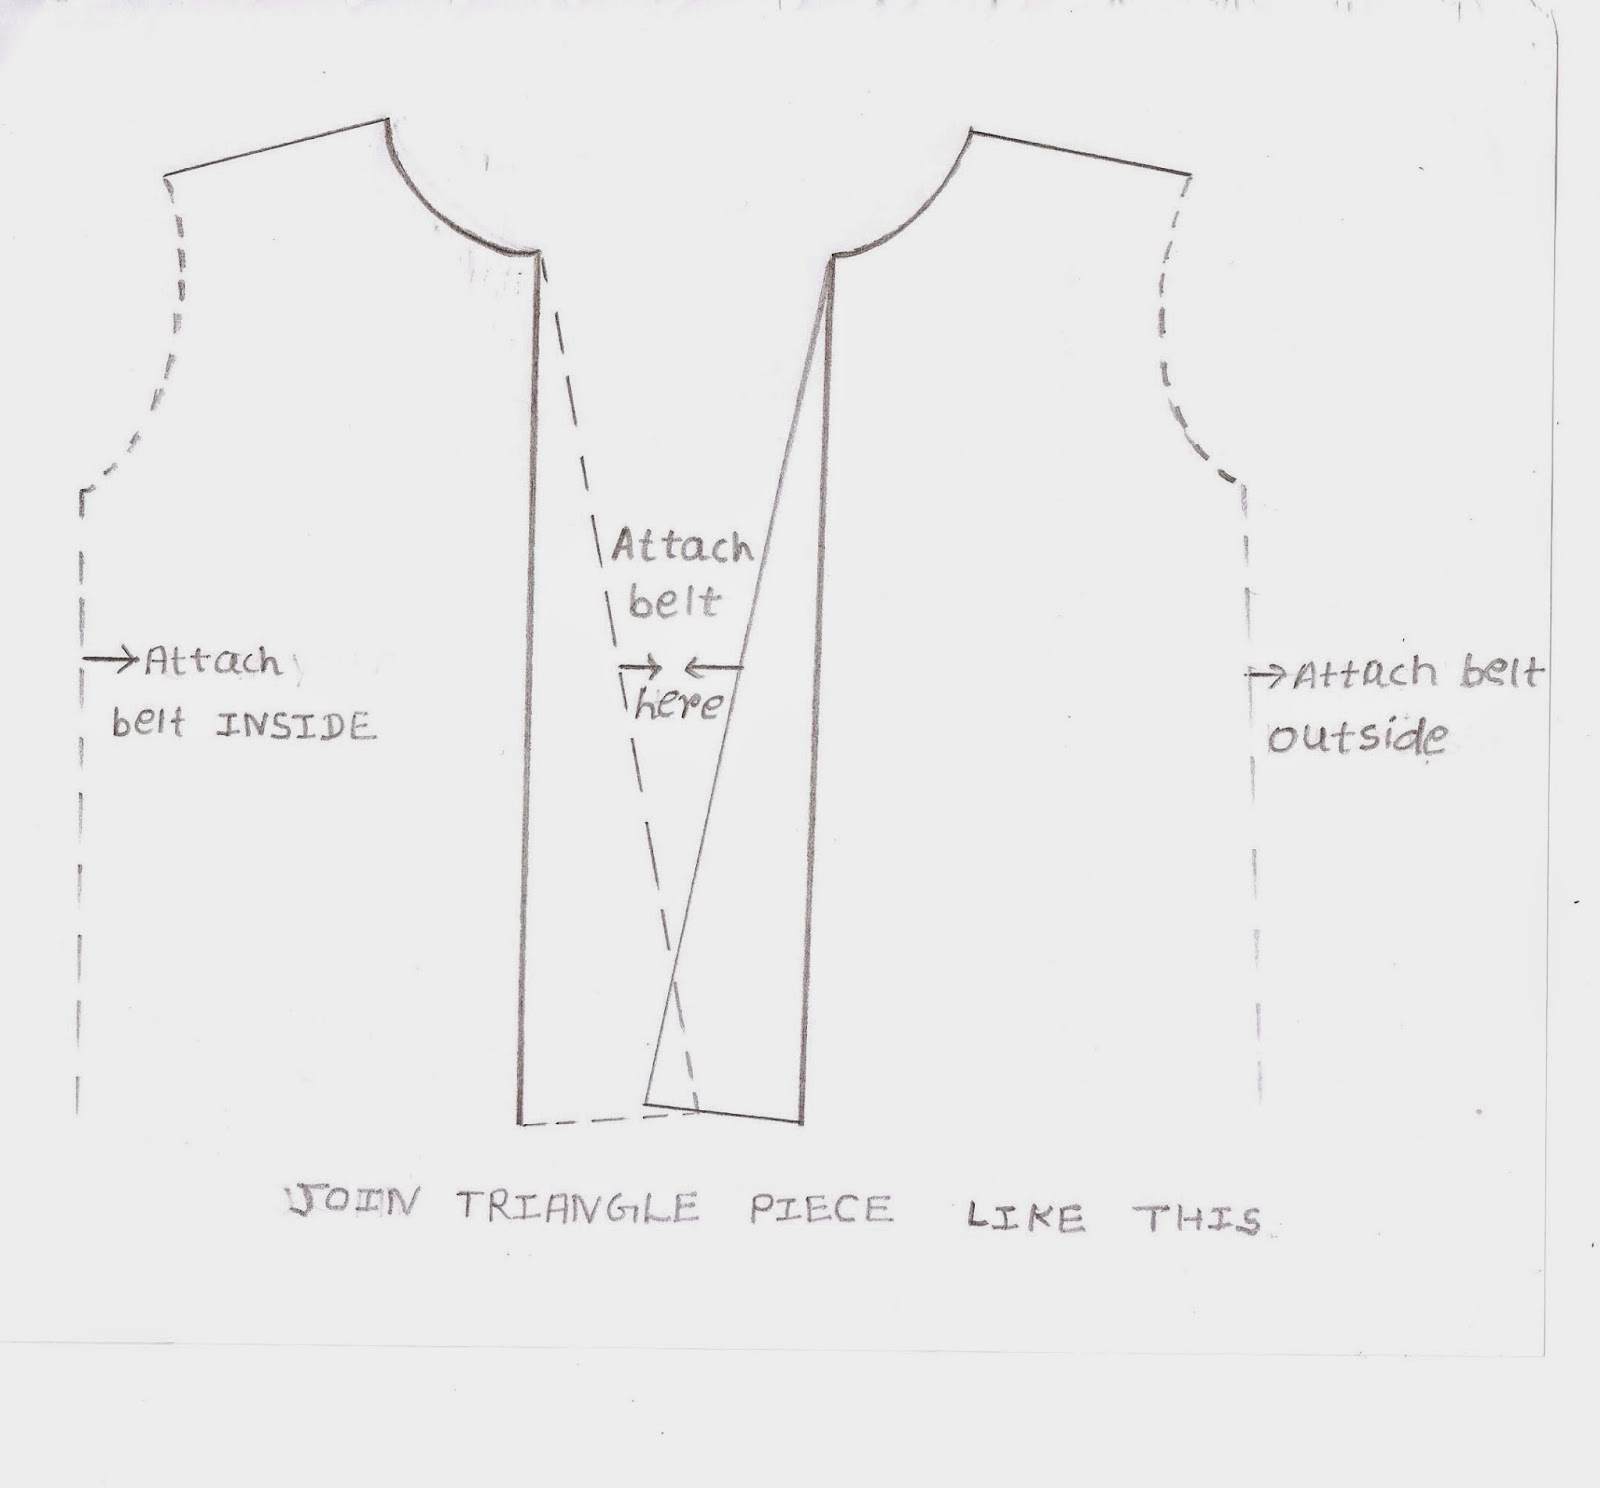
G: Seeing the figure make two triangle pieces.
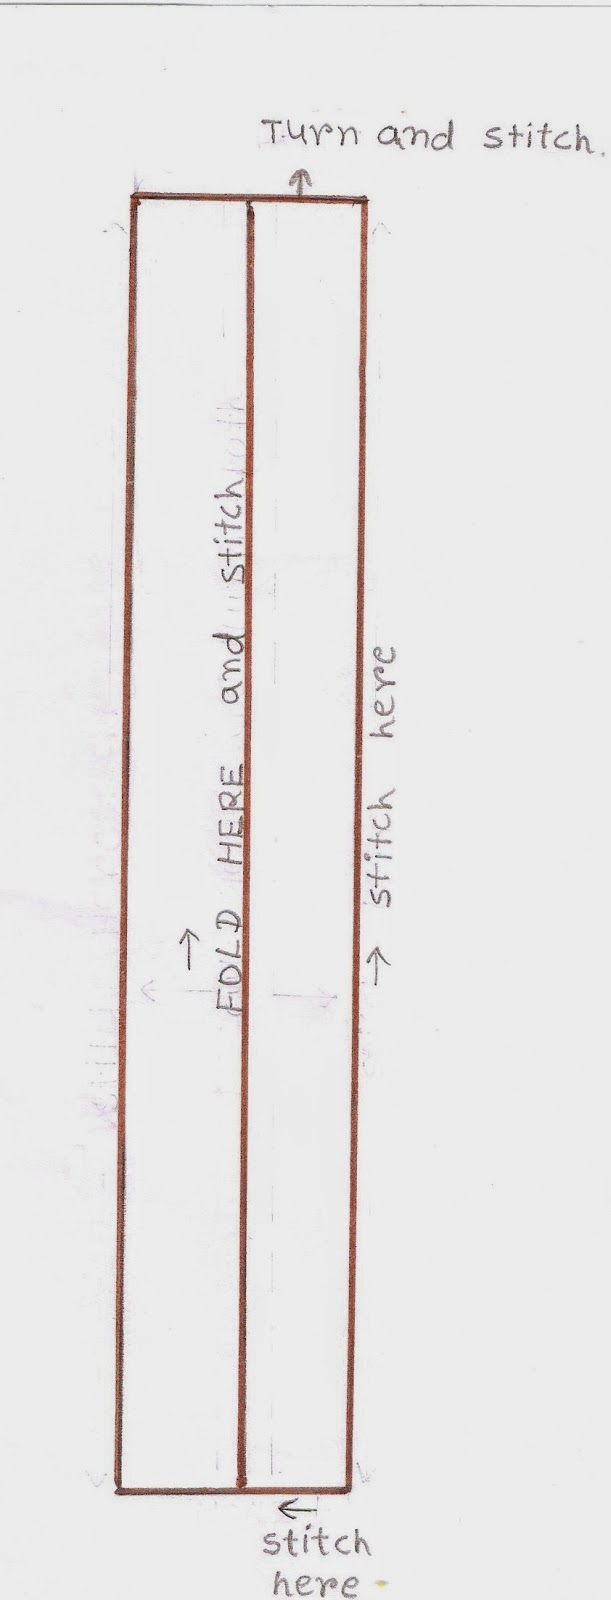
H: Make four belts as:
length-:12 inch
breadth-:2inch.
STEP2:- Seeing the figure take the measure and cut the cloth.
STEP3:- Now first stitch belt 1x12 inch then keep it separate. Next seeing the figure stitch two triangle pieces and keep it separate. Now fold corners of your sleeve1/2inch and keep it separate. Now fold your bottom side and both neck inside.
STEP4:- Now seeing the figure join both triangle pieces next attach belt, then join both shoulder pieces, next join the sides.
Your Nightie is ready!


STEP1:- Take the measure according to the following steps;-
A: Length+2 inch,
B: Breadth(chest circumference)+4divided by 4,
C: Shoulder to shoulder+1inch,
D: Front neck 3inch(or your wish), back neck 2inch(or your wish),
E: Sleeve length 7inch( or your wish), arm circumference(chest circumference divided by 4 -1),
F: Hip + 6inch,
G: Seeing the figure make two triangle pieces.
H: Make four belts as:
length-:12 inch
breadth-:2inch.
STEP2:- Seeing the figure take the measure and cut the cloth.
STEP3:- Now first stitch belt 1x12 inch then keep it separate. Next seeing the figure stitch two triangle pieces and keep it separate. Now fold corners of your sleeve1/2inch and keep it separate. Now fold your bottom side and both neck inside.
STEP4:- Now seeing the figure join both triangle pieces next attach belt, then join both shoulder pieces, next join the sides.
Your Nightie is ready!


Author: Mrs. Bhawna Gupta is a professional tailor for ladies dresses (Indian Blouse, Chudidar, Salwar Suit, Maxi, Frock, Kids Skirts, Tops etc) over more than a decade. She had completed the Advanced Diploma in Tailoring from Madras Institute of Tailoring. Disclaimer - This BLOG is published for learning purpose. Author has no liability for any damage or loss. This blog cannot used for commercial, publishing in other electronic media purposes.
No comments:
Post a Comment